I may earn a small commission on sales made from links on this page... It enables me to keep bringing you new content!!

Friday, November 21, 2014

Sharpie Mug Decorating

I really love this idea!!! Make your own mugs to fit your décor or personality!!!!
(I love "Princess Bride" too -  =) LOL!)

Do you have a plain, boring mug that needs a bit of spicing up? Personalize your cups and mugs by drawing on them! You can use them to add personality to your home or even as gifts for your loved ones.

Here's how to start:

1.Buy some white cups or mugs. You can find them in superstores, thrift stores, dollar stores, and online.

2.Pick a sharpie. For long-lasting results, choose oil-based paint sharpie markers. Regular sharpie ink can come off even after baking. Pick a color to use on your mug. You can stay simple and choose one color, or be more ambitious and use multiple. If you're sticking to one color, then black is usually a good choice, given its striking contrast to the white background of the mug.

3.Start drawing. Decide what you want to put on the cup, and maybe practice drawing it on a piece of paper before drawing on the mug. Pick a meaningful quote or a cute graphic to decorate the mug with, and get inspired by mugs being sold on Etsy or by googling examples of sharpie mug projects online.

4.Dry it out. Let your mug dry for a few hours or overnight before placing it into the oven. You can also draw over it again if you'd like to make sure the pattern doesn't come off in the wash. If you draw over it again, be sure to leave it out to dry again before baking.

5.Bake it. Bake the mug in the oven for 30 minutes at 350°F. Remember to place the mug in the oven before it heats up and leave it in until the oven cools completely so there won't be any cracks. You can choose to bake the mugs twice to really set in the sharpie drawings.

6.Care and wash. Hand wash the mug gently instead of throwing it in the dishwasher, as a machine washer may ruin the design.

Tips:
Some sharpie mug DIY-ers may advise you to spray the mug with acrylic sealing spray to make sure the sharpie etchings doesn't rub off. I personally didn't want to do that because the spray can be toxic. However, if you decide to go that route, be sure to avoid spraying near the top and on the inside of the mug. You can cover those areas with masking tape to protect them before you spray.

(Originally found on http://www.popsugar.com/smart-living/Sharpie-Mug-DIY-Project-24955886)


Sunday, November 9, 2014

How To Clean a Wool Rug with Snow

This one won't do me any good, we seldom get snow in Alabama, and when we do it usually doesn't last long... But for those of you in cooler climates, this will be a great idea!!!

This comes from http://www.apartmenttherapy.com/how-to-clean-a-rug-with-snow-h-109136


Heavy wool rugs can be difficult to clean well without chemical processes. Shaking is hard because of the weight, and beating the rug ends up with a flurry of dust in the air. But if you're in a deep freeze with plenty of powdery snow, the cleanser is right outside your door: Snow cleaning is an old process that we've heard about in Scandinavia. It works in the midwest, too (or anywhere else, for that matter) during deep winter. After a recent dry dusty snowfall, I tried the cleaning method for myself.

What You Need
Materials:
 at least 3-4" of clean, powdery snow
 cold temperatures well below freezing
 an area rug in need of a good cleaning
Equipment:
 broom
 a place to hang the rug

Instructions:
1. Hang the rug outdoors for at least 30 minutes to acclimate it to the cold temperature (when we did this it was 8F outside). This will prevent snow from melting on the rug.
2. Lay the rug face down in snow.
3. Beat it thoroughly with a broom.
4. Flip the rug over and beat it again.
5. Sweep the snow from the rug.
6. The deep freeze kills smelly bacteria. Beating in the snow loosens dirt and grime. And sweeping the tiny snow crystals from the face of the rug removes any last particles from the surface. The result is a deodorized, bright and clean rug.


Remove Household Rust With These 5 Natural Remedies


Rust is a quiet, subtle thing that sneaks up on your pans, pots, servingware and even some furniture.
**One tip before diving in is to grab an old toothbrush for your applicator if one isn't included in the recipe. Although steel wool and abrasive brushes are thought to really "scrub" away the rust, they also can cause further abrasions on the piece causing more rust. So with the right proportions of the recipes below, all that harsh scrubbing shouldn't be necessary.

1. Salt + Lime: Sprinkle a little bit of salt on the rust, then squeeze the lime over the salt until it is soaking. Let the mixture sit for 2-3 hours and then remove the rust with the lime rind. This can also be done with a lemon. We like the salt and lime a little more because they double as margarita ingredients as well.

2. White Vinegar + Aluminum Foil: One smart reader dipped aluminum foil in white vinegar and scrubbed away the rust.

3. Baking Soda + Water: Put baking soda directly onto the rust, and then with a toothbrush apply water and scrub. This Re-Nest reader suggests going with the grain depending on what you are cleaning.

4. Vinegar Soak: This smart reader places smaller rusty items in an overnight vinegar soak, like rusty tools, and hasn't needed to scrub any of them!

5. Potato + Dish Soap: Emily Ho recommends cutting a potato in half, and then dipping the cut end in dish soap or baking soda. Then apply the soaked end to the rusted area and rub. To keep going, just cut the potato's top layer and re-apply the soap.

**** One final tip: Make sure to dry the item thoroughly after removing the rust! We wouldn't want all of your hard work to be undermined. Also, prevention is key. So keeping things clean, paint jobs fresh, and applying quick coats of primer will help reduce rust in the future.

(from http://www.apartmenttherapy.com/5-home-remedies-to-remove-rust-140463)


DIY Air/Fabric Freshener


This seems like a rather expensive option, but this is another Idea for a "Febreeze" copycat...

You can make your own spray air-freshener in just a few minutes using three simple ingredients. It’s a natural way to remove household odors, and the spray works well in the bathroom, on most fabrics and carpets, even in shoes. You can also customize it to suit your tastes.

The recipe:
  • 1 oz gin, vodka, or rubbing alcohol
  • 6 oz filtered water
  • 20 – 40 drops of essential oil, a few suggested oils are: peppermint, jasmine, citrus oils
We think this combination works well, and it’s strong enough to work without being too strong. My preference is to use gin as your alcohol and jasmine as your essential oil, but you should experiment to find a mix that you like. Simply mix in a spray bottle and spray around for instant freshness. This mix will keep well for at least a month.


An Excellent Homemade 3-Ingredient All-Purpose Cleaner


You can make your own all-purpose cleaner using three basic, inexpensive, non-toxic ingredients. They are: water, hydrogen peroxide, and lemon juice. You can use this cleaner for everything from streak-free mirrors to wiping out the cat litter box.

The recipe:

2 cups Water
1 cup Hydrogen Peroxide
¼ cup Lemon Juice

Mix and adjust to suit your needs.

***Hydrogen peroxide is the key to this cleaner. It’s inexpensive, non-toxic, and readily available. It's a nearly odorless liquid that is commonly used on open wounds and therefore safe to use around pets and children. Hydrogen peroxide has stronger cleaning capabilities than vinegar and works much like bleach, just without any harmful health or environmental effects. You can also add about half a cup of this mix into laundry water to whiten clothes. The acidic lemon juice helps break down grime and add a fresh citrus scent. Water helps dilute the mixture. I keep it pre-mixed in a reused windex spray bottle for easy access.


DIY GREEN Lemon Furniture Polish

What You Need:

Ingredients
1 lemon
Olive oil
Water
Equipment
Small container with air-tight lid
Strainer
Microfiber cloth

Instructions

1. Cut lemon in half and squeeze juice into container. I recommend straining the pulp and seeds.
2. Add tablespoon of olive oil.
3. Add tablespoon of water.
4. Tighten lid and shake until emulsified.
5. Pour small amount of polish onto cloth and begin wiping-down your furniture.
Additional Notes:
Since this is a natural and perishable recipe, you will have to make it fresh each time. When finished polishing, discard any remaining liquid you have left.


6 Ways to Green Clean Furniture Upholstery


Cleaning up spills and spots on upholstery can be tricky, but it's an important part of making sure that you can use your furniture as long as possible, helping save resources. We've rounded up a few tips after the jump on how to spot-clean upholstery safely and sustainably, so that you'll want to cuddle up with your couch again.

First, it's good to vacuum off cushions, or use a brush, every week, so dirt doesn't get ground in. When a spot happens, here are several green cleaners you can use (test in an inconspicuous place before getting to work):


•For red wine spills, hydrogen peroxide is amazing. Blot up as much as you can with a paper towel, and then mix a teaspoon of eco-friendly dish soap with a cup of hydrogen peroxide. Blot it on the stain, with a dry towel behind the fabric to soak things up. This works on carpet, clothing, and other fabric, too. We've seen a glass of red wine literally disappear from snowy white carpet. Hydrogen peroxide can also remove ink stains.


•For coffee stains, Ecocycle recommends mixing an egg yolk with luke-warm water and rubbing that on the spot.


•For any type of stain, whipped detergent works well. Fill a container with half dish detergent, half water, and use a hand mixer to whip it up. Use a rag to rub the froth into the spot, and then rinse with water.


•Shampoo mixed with water is also a good general stain remover.


•Steam-cleaning takes electricity, but uses only water, and can often remove stubborn spots.


•If you're facing really stubborn stains and want to hire outside help, one option is Chem-Dry, which uses carbonation to clean upholstery (and carpets) without solvents, enzymes, harsh chemicals, and with very little water.


How To Green Clean Grease From Kitchen Surfaces

Grease is the word. Whether you're frying up a pan of bacon or sautéing veggies in olive oil, grease splatter abounds. It multiplies in tiny little droplets and clings to your stovetop, cabinets, backsplash and any other areas close by. It's often difficult to remove, especially if you aren't able to clean it right away, so we've compiled a simple how-to for cleaning up the mess with basic items you already have in your kitchen.

What You Need

Materials
•Vinegar
•Baking soda and/or Vegetable oil

Tools
•Dishcloth
•Sponge
•Spray bottle

Instructions

Vinegar: Pour undiluted vinegar into an empty spray bottle and apply generously to the greased surface. Let sit for 5-10 minutes, then wipe clean with a dishcloth or non-abrasive scrubber.

Baking soda: Sprinkle baking soda on a damp sponge or non-abrasive scrubber and wipe down all greased surfaces. Follow with a clean, damp cloth to remove any powder residue.

Vegetable oil: If all else fails, a surprising grease remover is non other than —grease! A natural vegetable oil on a paper towel can remove a really difficult stain. Follow up with one of the methods above for that like-new sparkle.

 Note: For extremely difficult grease stains, you can use a Phosphate-free TSP (trisodium phosphate). It is a good replacement for the toxic, heavy duty cleaners that we all want to avoid.

(from http://www.apartmenttherapy.com/how-to-green-clean-grease-from-138621)


GREEN Clean Silver


This recipe might just be the holy grail of all natural silver polish. Like a magic cleaning wand for the laziest of chore keepers, this concoction makes tarnish disappear quickly, right before your very eyes.

What You Need:

• Aluminum foil
• Glass dish or aluminum baking dish
• 1 cup boiling water
• 1 tablespoon baking soda
• 1 tablespoon sea salt
• 1/2 cup white vinegar
• Rag for polishing
• Tongs to remove silverware from boiling water

Instructions:
1. Bring water to a boil. When combined with the other ingredients the water will activate the baking soda and start the process of transferring the tarnish to the foil.
2. Add the dry ingredients into the pan and slowly pour in the vinegar. You will cause a slight reaction, so pour carefully! It is possible to clean your silver without adding vinegar, but the vinegar will dramatically speed up the process.
3. Pour in the boiling water and then place the silver into your pan, making sure each piece is touching the foil. Try not to let any of the pieces overlap. This should only take about 30 seconds but if you have heavily tarnished pieces you may need to let them soak a few minutes longer.
4. Use tongs to remove the silverware and work off any remaining spots by buffing with a rag. Then, look deep into your shiny silver and admire the smartypants that brought it back to its original glory!


DIY GREEN Kitchen Cleaners


Making your own cleaning products for the kitchen is both economical and good for your health. When you're using baking soda, vinegar, and water, you can feel pretty confident that the cleaning you're doing isn't hurting you or the environment.

What You Need:

Ingredients:
Vinegar
Baking Soda
Lemon
Essential Oil (optional)
Water
Dish soap
Ammonia

Equipment or Tools:
Spray bottle
Bowl
Sponge
Scrub brush
Measuring spoons

Instructions
All-Purpose Cleaner:
 Using funnel, put 1 teaspoon baking soda, 1/2 teaspoon dish soap, and 2 tablespoons vinegar into your spray bottle. Give it a stir/shake. Let it sit for a minute, now fill bottle with warm water and shake it up. Give it a few more minutes to calm down, and add a few drops of essential oil if desired.

Garbage Disposal Freshener:
Take the pulp from a lemon (preferably one you've squeezed to use for something else) and toss it in the garbage disposal, along with a few thin strips of the peel. Run water and turn on disposal.

Sink or Stovetop Cleaner:
Put a 1/3 cup baking soda in a bowl. Mix in enough warm water so that you get a nice moist paste. Put paste on sponge or brush and scrub away. Make it as you need it.

Microwave Cleaner:
No need to reinvent the wheel. We always follow's Jonathan's advice.
  1. Put one or two cups of water in a large, heat-proof glass or ceramic bowl. and add one tablespoon of white vinegar.
  2. Microwave until about half the water has evaporated.
  3. Wait about 10 minutes and don’t open the door. This lets the water cool off a bit and the steam penetrate any baked-on crud in the oven. Remove the bowl carefully; the water will still be hot enough to burn, so wear hot mitts.
  4. Scrub the walls of the microwave with a sponge sprinkled with a bit of baking soda; baked on stains should come off with relative ease.
  5. Wipe down the microwave with a reusable cloth dampened in clean water and the oven will be sparkling clean and free of odors.
Oven Cleaner:
Begin by preheating the oven to (70C or 150F degrees (or your LOWEST setting available). While the oven is heating, put on a pot of water to boil. Once the oven has reached (150F OR 70C), TURN IT OFF and pour 1 cup of ammonia into a heat safe bowl or baking dish and place it on the top rack of the oven. Place the pot of boiling water on the bottom rack, close the oven door, and leave them both in the oven overnight.

The next morning, open the oven and remove both the bowl of ammonia and the pot of water, keep the ammonia – you’ll use it later. Remove the racks and leave the oven door open to air out for 15 minutes. Add 1-2 teaspoons of dishwashing liquid to the ammonia, along with 4 cups of warm water, and using a heavy-duty nylon scrubbing pad dipped in the ammonia mixture, begin to wipe away the softened grease and grime along the sides and bottom of the oven.

 It should be a fairly easy job at this point. Wear some rubber gloves, since ammonia can be caustic to skin. Rinse/wipe clean with a damp cloth. Wear a mask if the ammonia bothers you…


Do you have any tips?


How To Green Clean the Grout In Your Bathroom


What You Need
An arsenal of green cleaning products, namely baking soda, vinegar, or non-toxic oxygen bleach.

Equipment: A grout brush (or old toothbrush)


Instructions
We'll start out with the lightweights and move down the list to heavier-duty eco cleaners. They're all good for superficial cleaning, maintaining, and getting rid of a little mold that's built up over a couple of months. For extra grime, see steps 5 through 7.

1. Grab an old toothbrush or a small grout cleaning brush. We'd recommend the special purpose tool because grout brushes have sturdier bristles and are a little bigger, but an old toothbrush will totally work in a pinch.
2. Start simple. Spray the affected area with a 50-50 mixture of vinegar and water, and then scrub with the brush. *Here's a tip: forget straight lines, and scrub in circles to remove more grossness from the grout.
3. If that's not doing the trick, reach for the baking soda. Make a paste by mixing baking soda with water, then spread the mixture along the grout.
4. Using the brush, scrub the baking soda mixture into the grout, again in circular motions. Rinse well and repeat if necessary.

If those don't work for you, you can try these:

5. Try out a steam cleaner. You can rent one from most home improvement stores.
6. If that's not enough, turn to a non-toxic oxygen bleach—which is normally combo of borax or sodium percarbonate. Just like baking soda, make a thick paste to scrub into the grout.
7. Leave the paste on the grout for about 15 minutes, and then scrub it off and rinse well.
That should do it! If you have any more eco-friendly grout cleaning tips, be sure to share.

(from http://www.apartmenttherapy.com/how-to-clean-grout-138432)


How To Naturally Clean a Bathtub with Grapefruit and Salt


Lemons and vinegar are the great dynamic duo of green cleaning, but there's nothing quite like the smell of fresh grapefruit. It's fresh and sweet, and can give your bathroom that extra boost of freshness that is usually only obtained with heavily scented candles and other cleaning products that aren't so earth-friendly.


What You Need

 1 Grapefruit
 1/4 cup coarse kosher salt


Instructions
1. Halve Grapefruit: 1 medium to large grapefruit will clean your entire bath or shower from top to bottom, including all the fixtures. Simply cut it in half with a knife and you'll be all set.
2. Sprinkle With Salt: Using 1 grapefruit half at a time, sprinkle the top liberally with salt. Wet your bathtub and sprinkle the remaining salt around the bottom.

3. Get to scrubbing! Scrub your grapefruit around your shower or tub, making sure to slightly "juice" the citrus over each fixture and lifting it every few seconds to pick up fresh salt from around the tub instead of just pushing it around. You can also use the rind on stubborn areas.

4. Rinse: When all is said and done, simply rinse away the pulpy bits and the salt and your shower is as good as new.

Additional Notes:
 For my slightly-neglected tub I ended up using 2 grapefruits and about a half cup of salt. While the dirt and grime came off in a breeze, I'm afraid the rust might be etched in to the porcelain. You can also use this method to clean your sinks, toilets, tile and more — it just depends on how many grapefruits you decide to bring home from the market!


How to Make Your Own GREEN Bathroom Cleaners


What You Need

Ingredients
  • Baking soda – cleans, deodorizes, scours
  • Borax – cleans, deodorizes, disinfects
  • Castile soap or vegetable oil-based liquid soap – cleans
  • Distilled white vinegar – cuts grease and soap scum, dissolves mineral deposits, inhibits mold, freshens; reportedly kills 99% of bacteria, 82% of mold, and 80% of viruses
  • Essential oils – freshen, disinfect
  • Kosher salt – scours, disinfects
  • Water
Equipment or Tools
  • Measuring cups and spoons
  • Jars
  • Spray bottles

Instructions

TUB AND TILE CLEANER
In a jar or spray bottle, combine 1 2/3 cup baking soda with 1/2 cup vegetable oil-based liquid soap. Add 1/2 cup water and 2 tablespoons vinegar. Shake before using. Apply with a cloth or sponge and rinse well.

SCOURING POWDER:
Combine 1 cup baking soda, 1 cup borax, and 1 cup kosher salt in a jar. Sprinkle on area to be cleaned, wipe with a sponge, and rinse.

TOILET BOWL CLEANER:
Mix 1/4 cup borax or baking soda and 1 cup vinegar in the toilet. Let it sit for 15 minutes (or longer, if necessary), scrub, and flush.

GLASS CLEANER:
Combine 1/4 cup vinegar and 4 cups warm water in a spray bottle. Use to clean glass or mirrors with a dry cloth or piece of newspaper.

DRAIN CLEANER:
Pour 1/2 cup baking soda into drain followed by 1 cup vinegar. Let it sit and fizz for 15 minutes, then rinse with hot or boiling water. May need to repeat or leave baking soda and vinegar in overnight.

FLOOR SANITIZER:
In a bucket, mix 1/2 cup borax with 2 gallons hot water. Apply with a mop or sponge. Rinsing is not necessary.

SOAP SCUM REMOVER:
Sprinkle on baking soda, scrub with a cloth or sponge, and rinse. Vinegar or kosher salt also work.

CALCIUM OR LIME REMOVER:
For calcium or lime deposits on a chrome faucet, soak a towel in vinegar and wrap it around the faucet. Let it sit for a couple of hours or overnight.

MOLD OR MILDEW REMOVER:
Mix 1/2 cup borax and 1/2 cup vinegar to make a paste. Scrub with a brush or sponge and rinse with water. For tough mold, let it sit for an hour before rinsing with water.

Where to find ingredients at the grocery store:
  • Baking soda: baking section
  • Borax: laundry section
  • Vegetable oil-based soaps: cleaner section
  • Vinegar: salad dressing section
  • Essential oils: health food stores
  • Kosher salt: spice section
Additional Tips:
• Add a few drops of essential oil for fragrance and/or cleaning power. Eucalyptus, lavender, lemon, tea tree, and thyme are among the essential oils considered to be antiseptic and antibacterial.

• Using a label or permanent marker, write recipes directly on jars and bottles for future reference.


(from http://www.apartmenttherapy.com/how-to-make-your-own-bathroom-cleaners-shopping-list-recipes-108150)

Wednesday, November 5, 2014

Stack O' Jacks Pumpkin Planter


This project looks easy enough...
All you need is a large pot, about 5 of the pumpkin buckets and a piece of rebar about as tall as you want your planter stack to go... I would say about 7-8' long.
You will also need a drill and a bit about the size as the rebar, approx. 1/2".
Stick your rebar into the previously filled pot as the base/weight to hold your stack.
Drill through each pumpkin, near the bottom and near the top causing each to sit at an angle, alternating each so they appear to be falling.
Place each pumpkin bucket on the rebar as you go to get the look you want, until you reach the top.
Add your dirt and plants to each pumpkin and voila'!!!


DIY Cement Pumpkin Planter

I really love his Idea and now that Halloween is over the Pumpkin buckets are a steal!!


"Since my kids are too old for Halloween pumpkin buckets now, I was looking to repurpose the ones I have into something interesting," says Rhonda. "So, since I like working with all things concrete, I decided to turn mine into concrete planters. I had seen similar ideas on Pinterest using a Styrofoam pumpkin, but I didn't have one of those. Don't worry; this is an easy project, even for un-crafty people like me! Another plus is that it is really cheap. If you already have the pumpkins on hand, you are in luck, but if you buy them, they are less than $1 a piece. If you use a sack of pre-mixed concrete (the cheap stuff) it will cost under $3 and it will be enough to make two planters. So, if you do two of these it will cost less than $5! Let's get to work creating."


Turn one of these: 


Into one of these:


For this project you will need:


-One bag of concrete mix or your favorite concrete/hypertufa recipe

-Two plastic pumpkin pails

-A tub to mix the concrete

-Something to mix with (hands or a hand hoe)

-Cooking spray

-Water

-An inner mold—a couple of tall cups or similar will work

-Something to create a drainage hole, like a couple of squares (about one inch) of Styrofoam that was cut from a big piece. It has to be tall enough for the inner mold to sit on.
-A mask and a pair of gloves


If you want to make a reusable mold you will also need:


-Duct tape

-A sharp cutting instrument, like an X-acto knife, to cut the pumpkins in half


"The beginning of the instructions will show you how to make a reusable mold, but if you prefer to just make a pumpkin once, then skip down to step 3," says Rhonda.


Step 1: Start by taking a sharp instrument and cutting along the "seam" of the pumpkin (which should be on the side). I did the bottom first, then the sides:


"When you are done cutting, it should look like this," Rhonda explains. "Don't forget to cut off the handle."

"Now it's ready to tape back together."


Step 2: Hold the pumpkin together and begin taping along the seams where you cut. Use smaller pieces of duct tape at first to get a start, then you can use bigger pieces to completely tape it back together. Starting at the bottom is easier. Make sure you tape the bottom up really well.
When you are done, they should look like this:


Step 3: Spray the inside of the pumpkins and your inner mold with cooking spray or some other mold release. I usually spray it in, then wipe it around on the inside. Fill your inner mold with some rocks or sand to weigh it down.


Step 4: Take your Styrofoam "spacer" and put it down in the middle of the bottom.


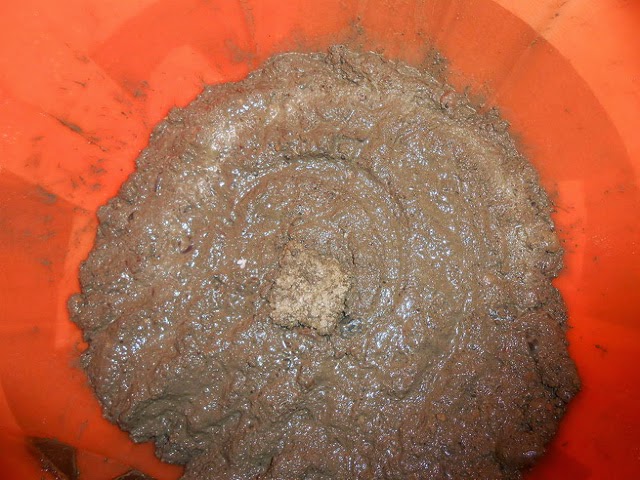
Step 5: Mix up your concrete according to the directions. Remember: not too much water!


Step 6: Let it sit for a few minutes if it is NOT quick-setting concrete. If it is, you can begin to fill.


Step 7: Fill the bottom of the pumpkin, but don't cover the Styrofoam cube; just fill around it like this:


Step 8: Set your middle form on top of the cube, making sure it is centered (or as close to centered as possible).


Step 9: Fill up the rest of the way, pressing it down as you go. I used an old dowel I had laying around.


Step 10: When filled to the top, tap on the sides with your hands for about a minute to help release some air bubbles, then let it sit and harden for 24 to 48 hours. Don't unmold too early or it might fall apart.


Step 11: When it has hardened, you can remove the mold. If you don't care about keeping the mold, just cut off the pumpkin. If you have taped it up to reuse it, all you need to do is cut off the tape.


Step 12: After you unmold it, you need to knock out the Styrofoam cube in the bottom. I used a mallet and my trusty dowel for this.


Step 13: Pull the middle out or keep tapping with the mallet until it releases. If it is still difficult, let it sit in the sun for a while. Sometimes that helps.


Here it is ready to cure:


Step 14: Let it cure for about a week. You can either put it in a grocery sack and mist it daily, or you can fill a container with water and let it soak. I prefer the water bath.


Step 15: After a week or two, remove the pumpkin from the water bath and let dry.


Step 16: Seal or paint to your liking. I used Rust-Oleum Wet Look Concrete Sealer on mine. Glow-in-the-dark paint would also be really cool!


Step 17: Add plants and set it out in your garden or on your steps.


"You can paint, stain, or seal this project any way you want. Use your imagination! I really think the glow-in-the-dark paint would be cool—especially if it was just the eyes," Rhonda says.


Check out the full tutorial—including photos, instructions, and details—on Rhonda's blog, Sproutsandstuff.


We always love easy DIY projects, especially from our friends at Hometalk, the social network for home and garden lovers. Be sure to check out the site for more DIY tutorials.


----

Trying to keep down heating costs?


As its getting colder, and is already cold in some parts of the world, here are some tips to keep you from having to turn on that furnace just yet…


In the quest of saving money without sacrificing your comfort, many home owners and renters alike are searching for ways to keep warm. Save on your energy bills while keeping your bank account happy and full with these 25 effective ways of staying warm without your heating unit.


1.) Wear Multiple Layers of Clothes Now is not the time to strut around in a pair of shorts and a t-shirt. Dress in multiple layers to keep your core temperature comfortably warm.

2.) Don’t Forget Your Socks According to the University of San Diego, if you have cold feet, you’re going to be cold. Keep warm by wearing thick wool socks.

3.) Keep Your Oven Door Open After baking, keep your oven door open to let its heat circulate throughout your kitchen. The smaller your home, the better this technique works.

4.) Eat Hot Soups Raise your core temperature by consuming hot soup on cold winter days.

5.) Don’t Skip the Coffee or Tea Along with the caffeine boost, hot coffee or tea keeps you warm from the inside. Want to avoid stimulants? Drink decaffeinated coffee or tea.

6.) Open Your Window Curtains or Blinds During the day, open curtains or blinds to let warm sunlight naturally heat your home.

7.) Treat Windows to Capture and Safeguard HeatInstall special window treatments to capture and retain heat within your home. Improperly treated windows can let a vast amount of heat escape into the cold winter nights.

8.) Close Window Curtains and Blinds at NightPrevent Father Winter from stealing your heat by closing window blinds and curtains at night when temperatures drop

9.) Stay Active Clean your home or exercise whenever you feel the sting of coldness. By staying active, you’ll naturally increase your core temperature.

10.) Increase Humidity in Your Home Humidity increases the temperature within your home. Therefore, skip your space heater and turn on an energy-efficient humidifier

11.) Reverse Ceiling Fan Circulation Instead of keeping your ceiling fan turned off, reverse its circulation to push warm air down into your living space. This is effective after you’ve ran your heater for a little while.

12.) Buffer Hard Floors With Blankets While rugs are best, if your budget doesn’t allow for this purchase, place blankets on bare floors to keep them warm.

13.) Keep Bathroom Doors Open When ShoweringLet the warm, humid air seep out into the rest of your home while showering by keeping your bathroom door open.

14.) Don’t Run Bathroom Ventilation Fans While ventilation fans draw out unpleasant smells after using the bathroom, it also sucks out warm air. Light a candle to eliminate smells to keep your bathroom warm throughout winter months.

15.) Use Towels to Block Chilly Air Roll up a towel and place along the bottom of a door to stop drafts and heat leaks.

16.) Keep the Fireplace Flue Shut Prevent winter drafts by keeping your fireplace flue tightly shut.

17.) Enhance Your Bedding Change out your sheets for flannel and use a down comforter to stay warm during frosty winter nights.

18.) Warm a Bag of Beans Warm a bag of beans in the microwave and place in your bed or against you while lounging on the couch.

19.) Cover Your Head Much like your feet, heat escapes through your head. Wear a wool hat or beanie to keep your body toasty.

20.) Keep Door Shut Keep all the doors in your home shut. The smaller the space, the easier it is to keep warm.

21.) Stay Away From Windows Move furniture away from large windows to keep warm. Even treated windows emit cooler temperatures during the peak of winter.

21.) Stay Cozy When lounging on your couch, cover with a warm blanket.

22.) Wear Slippers In addition to wearing wool socks, keep your feet extra toasty when doing chores by wearing slippers.

23.) Install Clear Shower Curtains Over WindowsAllow your home to absorb heat, and keep it in, by installing clear shower curtains over windows that receive direct sunlight.

24.) Add Insulation in Your Attic Keep heat from leaking out of your home by adding insulation to your attic or crawl space.

25.) Light by Candles Along with saving on energy costs by keeping your light off, candles also produce a decent amount of heat. While not as warm as a fireplace, these small heaters can keep your immediate area warm.