
"Since my kids are too old for Halloween pumpkin buckets now, I was looking to repurpose the ones I have into something interesting," says Rhonda. "So, since I like working with all things concrete, I decided to turn mine into concrete planters. I had seen similar ideas on Pinterest using a Styrofoam pumpkin, but I didn't have one of those. Don't worry; this is an easy project, even for un-crafty people like me! Another plus is that it is really cheap. If you already have the pumpkins on hand, you are in luck, but if you buy them, they are less than $1 a piece. If you use a sack of pre-mixed concrete (the cheap stuff) it will cost under $3 and it will be enough to make two planters. So, if you do two of these it will cost less than $5! Let's get to work creating."
Turn one of these:

Into one of these:
For this project you will need:
-One bag of concrete mix or your favorite concrete/hypertufa recipe
-Two plastic pumpkin pails
-A tub to mix the concrete
-Something to mix with (hands or a hand hoe)
-Cooking spray
-Water
-An inner mold—a couple of tall cups or similar will work
-Something to create a drainage hole, like a couple of squares (about one inch) of Styrofoam that was cut from a big piece. It has to be tall enough for the inner mold to sit on.
-A mask and a pair of gloves
-A mask and a pair of gloves
If you want to make a reusable mold you will also need:
-Duct tape
-A sharp cutting instrument, like an X-acto knife, to cut the pumpkins in half
"The beginning of the instructions will show you how to make a reusable mold, but if you prefer to just make a pumpkin once, then skip down to step 3," says Rhonda.
Step 1: Start by taking a sharp instrument and cutting along the "seam" of the pumpkin (which should be on the side). I did the bottom first, then the sides:

"When you are done cutting, it should look like this," Rhonda explains. "Don't forget to cut off the handle."
"Now it's ready to tape back together."
Step 2: Hold the pumpkin together and begin taping along the seams where you cut. Use smaller pieces of duct tape at first to get a start, then you can use bigger pieces to completely tape it back together. Starting at the bottom is easier. Make sure you tape the bottom up really well.
When you are done, they should look like this:
Step 3: Spray the inside of the pumpkins and your inner mold with cooking spray or some other mold release. I usually spray it in, then wipe it around on the inside. Fill your inner mold with some rocks or sand to weigh it down.
Step 4: Take your Styrofoam "spacer" and put it down in the middle of the bottom.
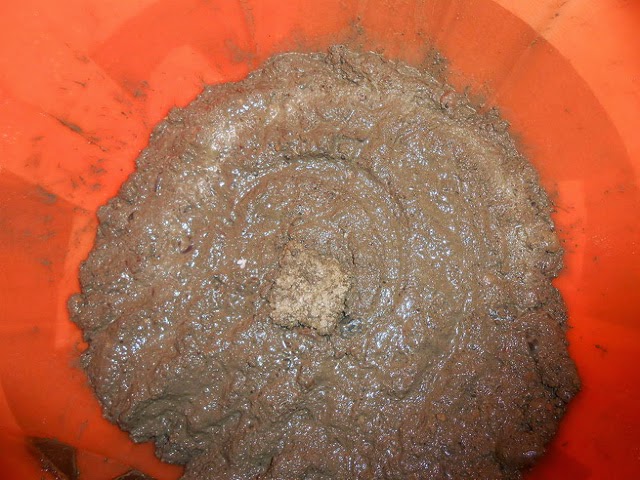
Step 5: Mix up your concrete according to the directions. Remember: not too much water!
Step 6: Let it sit for a few minutes if it is NOT quick-setting concrete. If it is, you can begin to fill.
Step 7: Fill the bottom of the pumpkin, but don't cover the Styrofoam cube; just fill around it like this:
Step 8: Set your middle form on top of the cube, making sure it is centered (or as close to centered as possible).
Step 9: Fill up the rest of the way, pressing it down as you go. I used an old dowel I had laying around.
Step 10: When filled to the top, tap on the sides with your hands for about a minute to help release some air bubbles, then let it sit and harden for 24 to 48 hours. Don't unmold too early or it might fall apart.
Step 11: When it has hardened, you can remove the mold. If you don't care about keeping the mold, just cut off the pumpkin. If you have taped it up to reuse it, all you need to do is cut off the tape.

Step 12: After you unmold it, you need to knock out the Styrofoam cube in the bottom. I used a mallet and my trusty dowel for this.

Step 13: Pull the middle out or keep tapping with the mallet until it releases. If it is still difficult, let it sit in the sun for a while. Sometimes that helps.
Here it is ready to cure:

Step 14: Let it cure for about a week. You can either put it in a grocery sack and mist it daily, or you can fill a container with water and let it soak. I prefer the water bath.
Step 15: After a week or two, remove the pumpkin from the water bath and let dry.
Step 16: Seal or paint to your liking. I used Rust-Oleum Wet Look Concrete Sealer on mine. Glow-in-the-dark paint would also be really cool!
Step 17: Add plants and set it out in your garden or on your steps.
"You can paint, stain, or seal this project any way you want. Use your imagination! I really think the glow-in-the-dark paint would be cool—especially if it was just the eyes," Rhonda says.
Check out the full tutorial—including photos, instructions, and details—on Rhonda's blog, Sproutsandstuff.
We always love easy DIY projects, especially from our friends at Hometalk, the social network for home and garden lovers. Be sure to check out the site for more DIY tutorials.
----
No comments:
Post a Comment